Install Software
Contents
- Overview
- Installation Of Visual Studio Code & PlatformIO
- Installation Of Git
- Drivers For ESP32 / ESP8266 Chipset
- Downloading The Software For ESP32
- Prepare To Compile
- Compile
Overview
The following software needs to be installed, starting with version 4 on the ESP32, or until version 3.1.3 with the ESP8266:
- Visual Studio Code
- PlatformIO (as an extension in VS Code)
- Git
- Drivers for ESP32 / ESP8266 chipset
Installation Of Visual Studio Code & PlatformIO
Go to the website of Visual Studio Code (VS Code) and download the correct version for your operating system. Open VS Code.

Go to Extensions (1) and look for platformio (2). Click Install (3) and PlatformIO will be installed.
During that, it’s possible that a message pops up, indicating that more software components are missing:
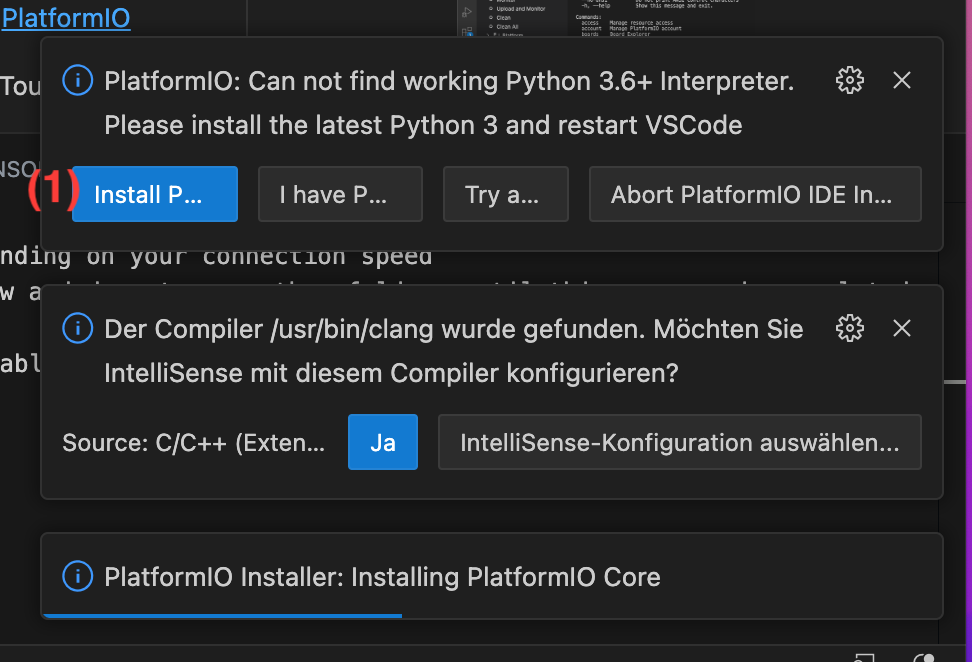
Python might be one of them. By clicking Install Python (1), you’ll get to the documentation of PlatformIO. Follow the installation steps described there. After that, go back to the pop-up message in VS Code and click Try again VS Code will show a message that PlatformIO was installed successfully:
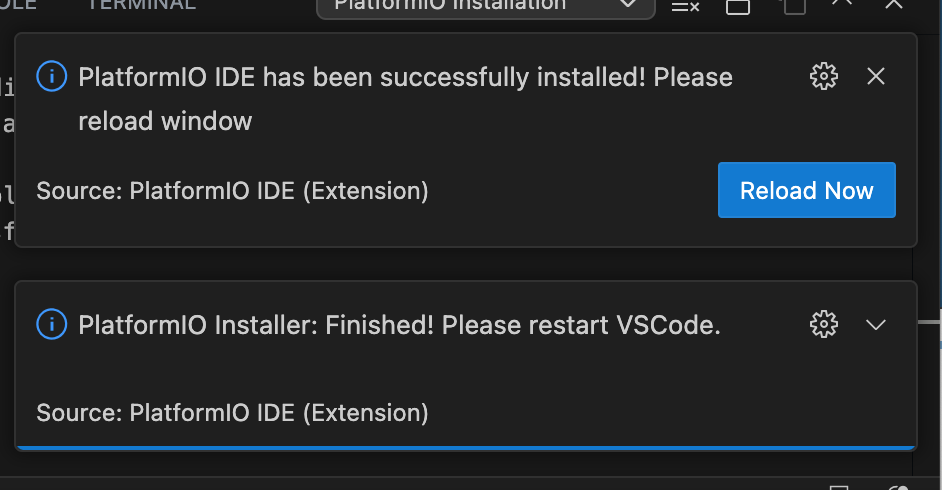
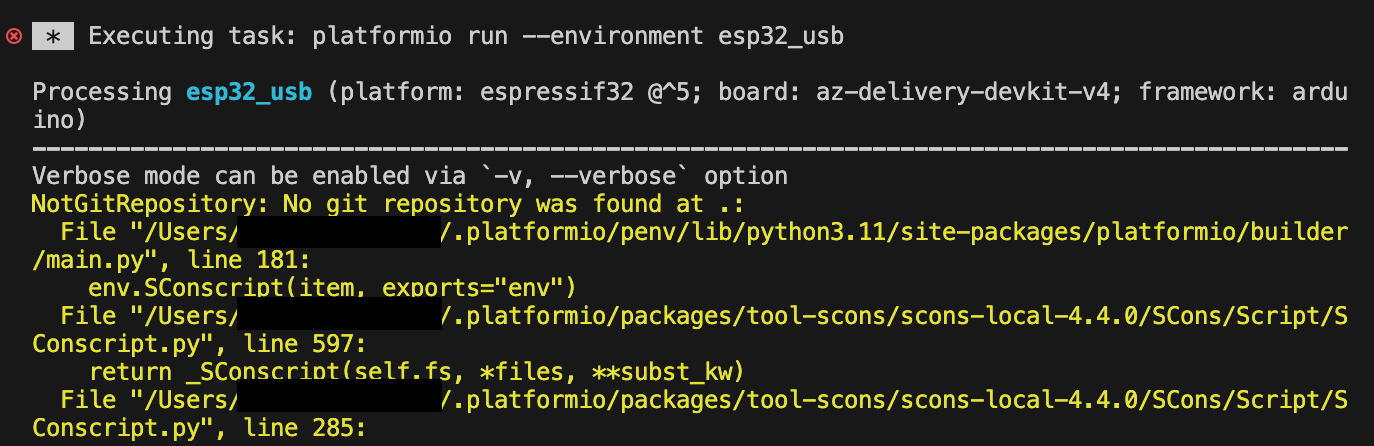
At this stage, you can’t compile our code yet, you will have to install git or GitHub Desktop first. If you still tried anyways, you would see an error message similar to this:
You can close VS Code for now.
Installation Of Git
We recommend that you install git stand-alone. Go to the website of git scm and follow the instructions on how to install git (without GUI) on either MacOS, Windows or Linux. On MacOS, homebrew is the fastest way.
Drivers For ESP32 / ESP8266 Chipset
Depending on your operating system, you might need to install an additional driver to use the ESP32 or ESP8266. You can use PlatformIO to check if the microcontroller got recognized already:
Open VS Code and click the PlatformIO symbol (the ant’s head) (1), then click Devices (2):

Now you should see the ESP32 or ESP8266 if it is connected via USB:
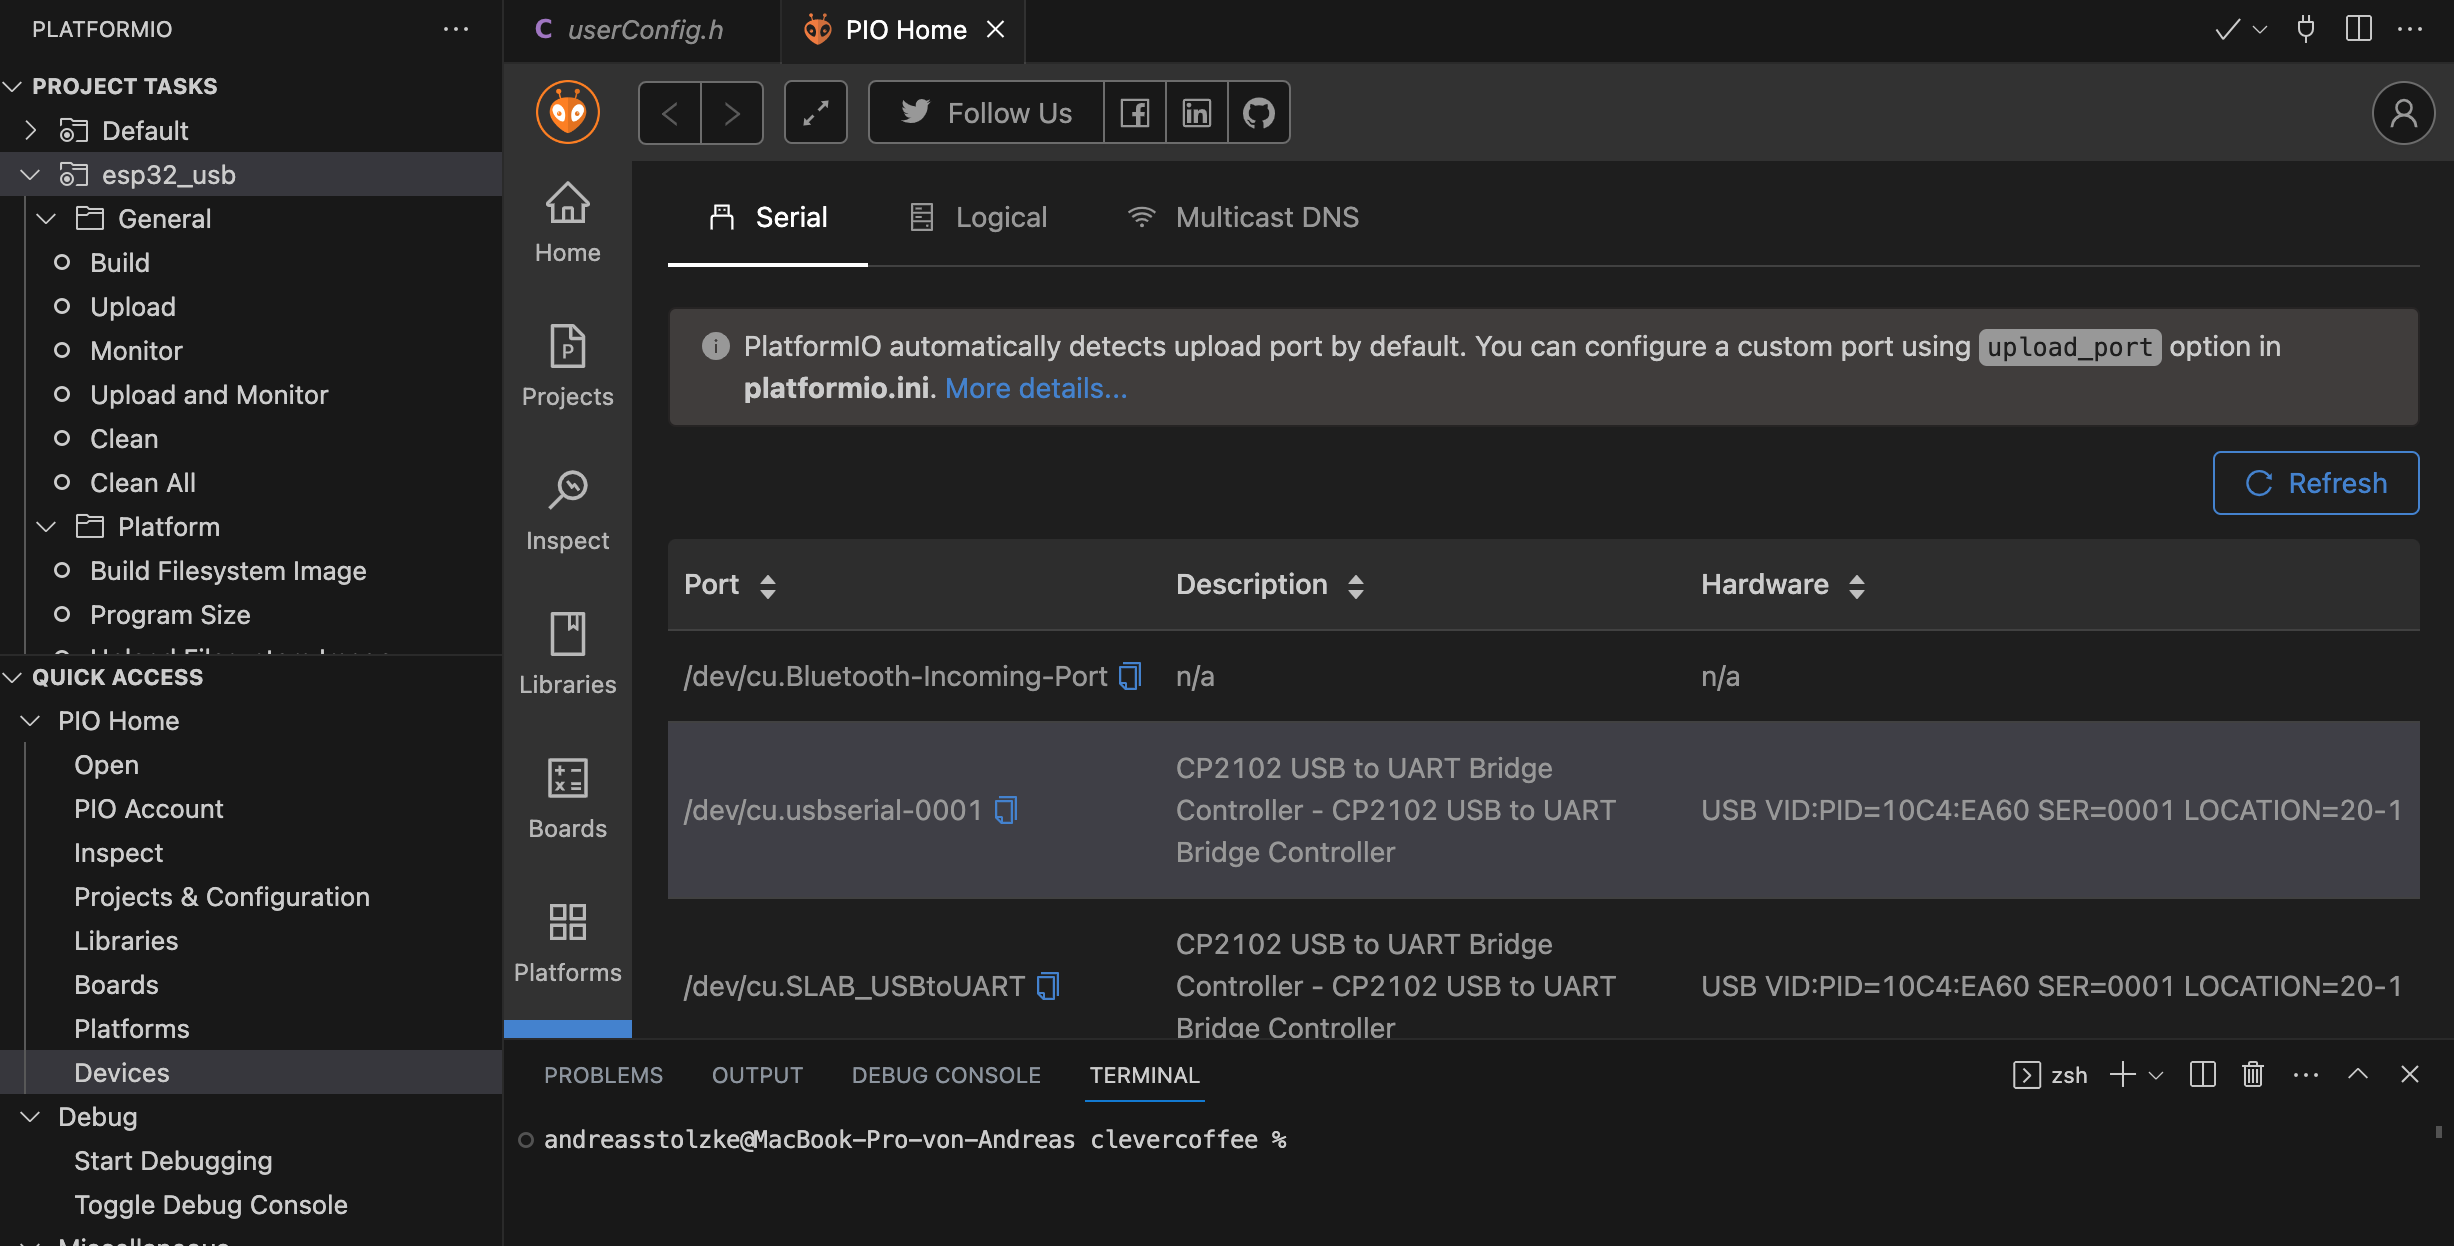
It should be described as device CP2102 at port usbserial-X. If this is not the case, please try again with a different USB cable (some of them are only made for charging). If there’s still no ESP32 or ESP8266 visible, you have to install the device driver:
The drivers should also work for ESP8266 microcontrollers, as long as it uses the same controller (CP2102).
IMPORTANT! After installation, the machine must be rebooted!
Downloading The Software For ESP32
After the reboot you can now continue with preparing the code for compiling. Open the directory you want to store the sourcecode of the clevercoffee project:: Click File -> Open Folder and pick e.g. /Documents/Github/clevercoffee.
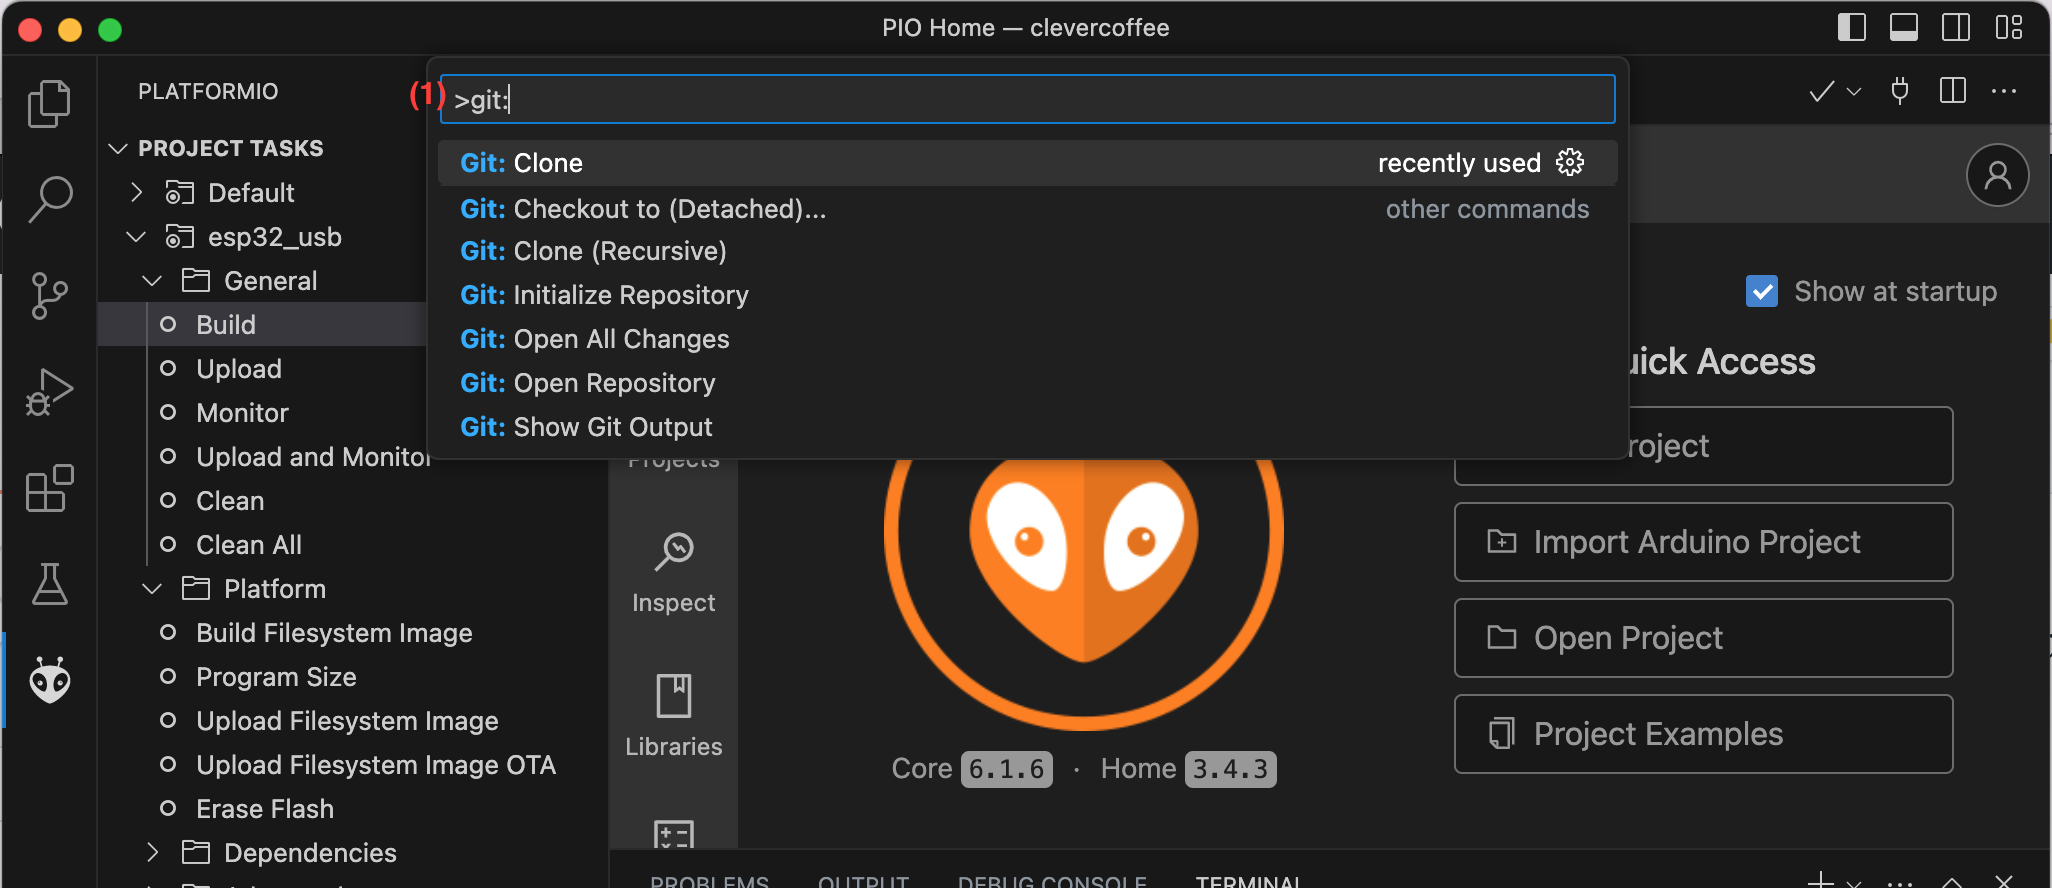
In VS Code, in the task bar click View -> Command Palette (on MacOS press Shift + CMD + P). Type (1): git clone
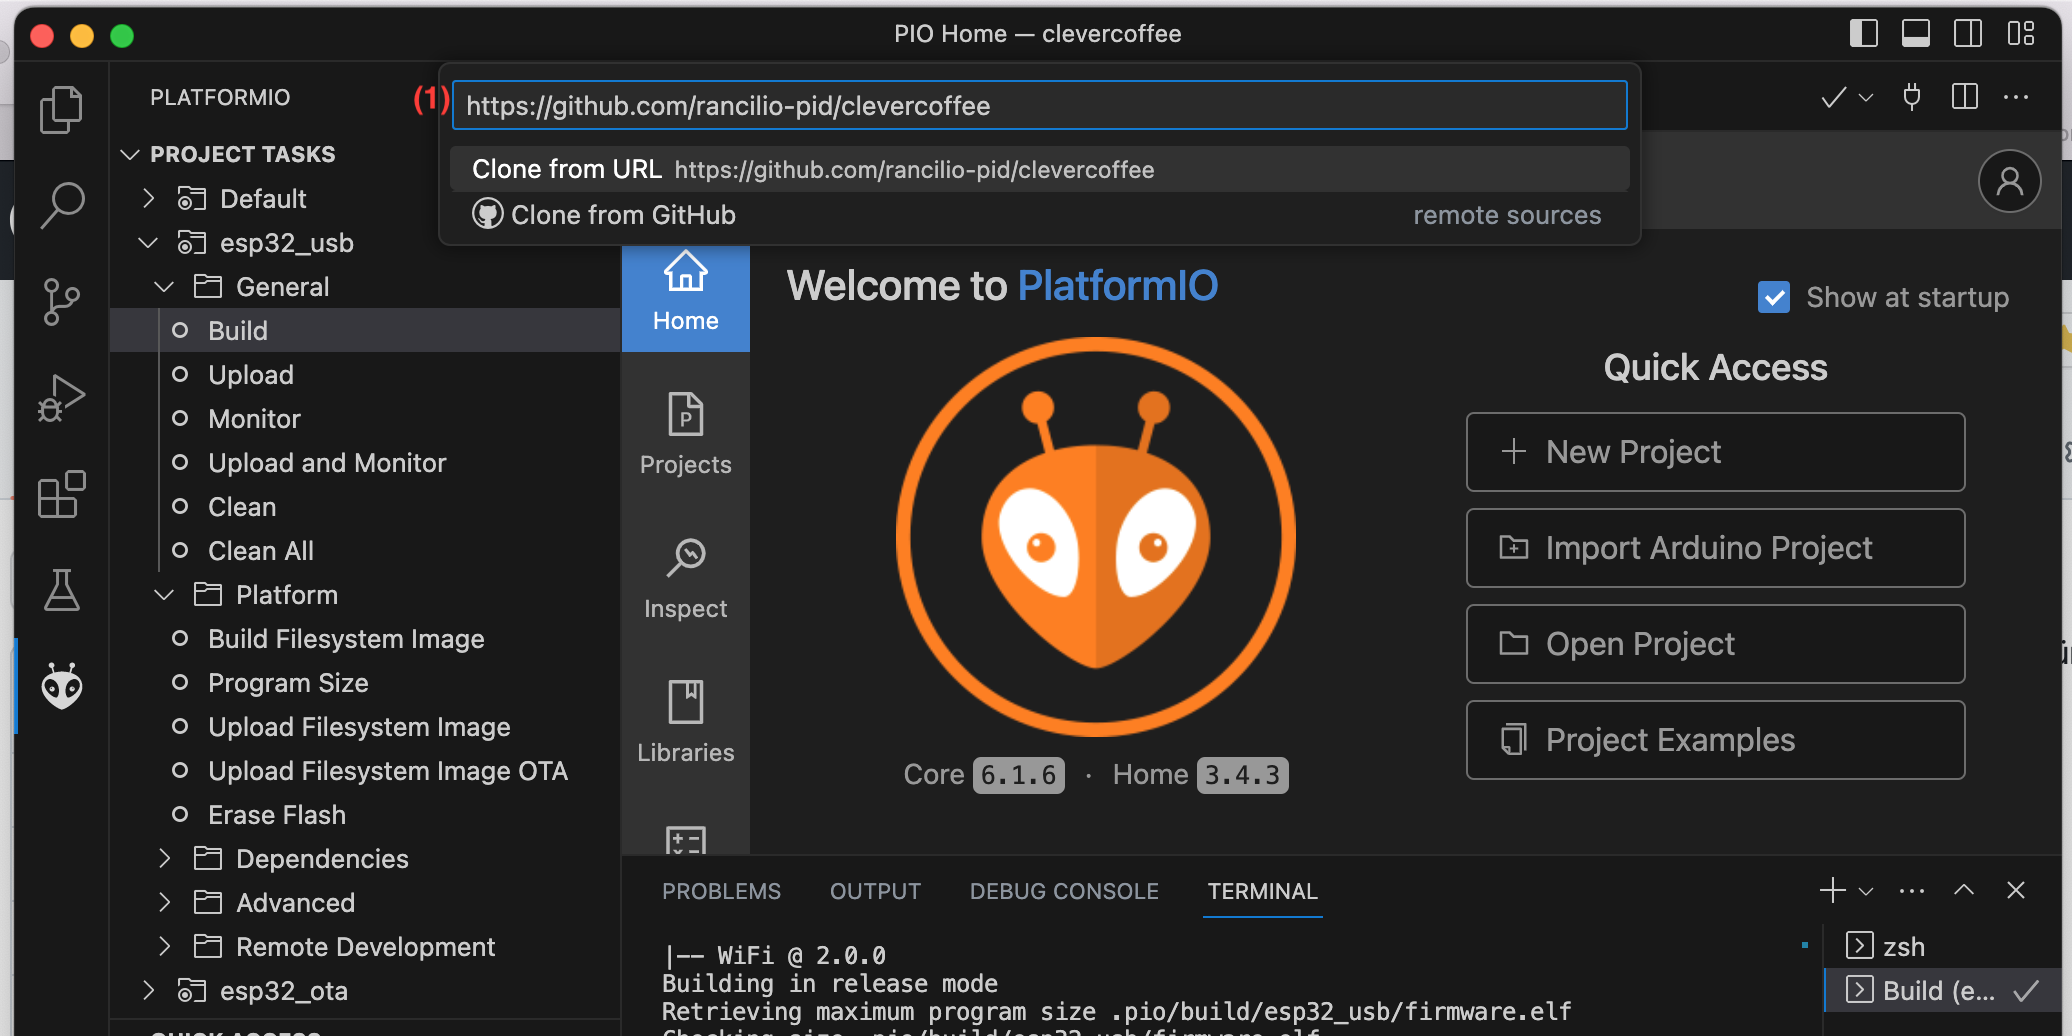
and add the following URL (1): https://github.com/rancilio-pid/clevercoffee Now press return. This command copies the sourcecode from GitHub to your local folder.
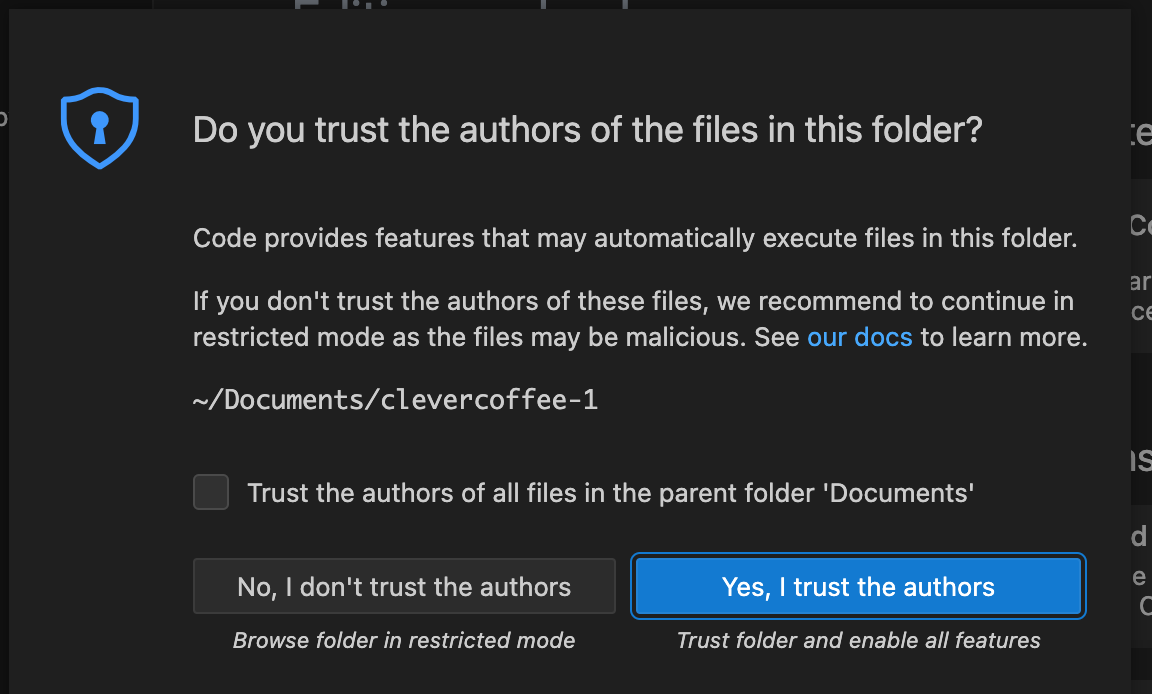
In the following dialog window, search for the directory where the the sourcecode should be copied. Then choose Add to workspace. A message might pop up, asking you to confirm the trustworthiness of the code. Click Yes, I trust the authors to proceed.
Open VS Code and click View -> Command Palette (in MacOS press Shift + CMD + P). Enter (1) git: checkout to

Press return or click the proposed command. A list of all available versions of the sourcecode will be shown:
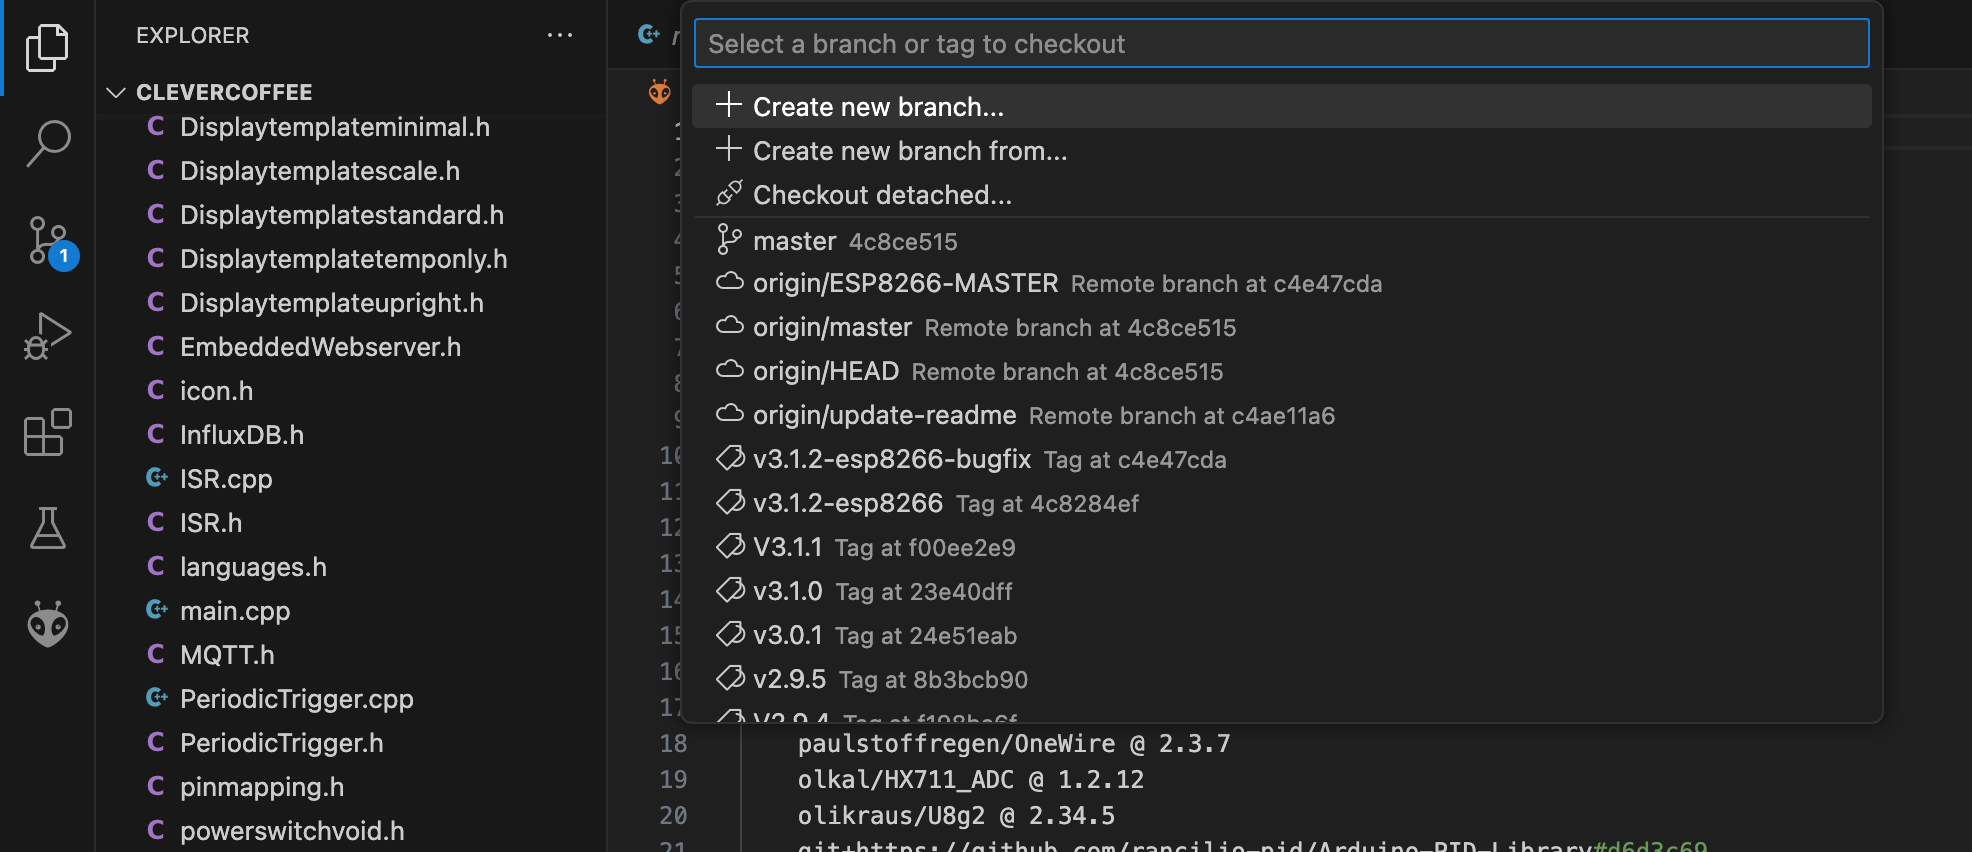
If you use the ESP32 microcontroller, only versions starting with 4.X.X are relevant, those versions do not support the ESP8266 anymore.
Version origin/master represents the most current development version for the ESP32.
Version origin/ESP8266-master represents the most current development version for the ESP8266. That version only receives bugfixes. The most current stable version for the ESP8266 microcontroller is always marked with the suffix -esp8266, for example v3.1.2-esp8266.
Pick the most recent stable version for the ESP32. It will take a few seconds to download the code.
Prepare To Compile
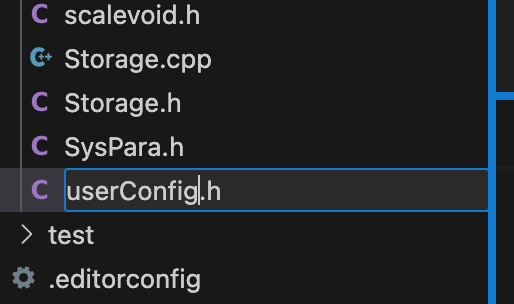
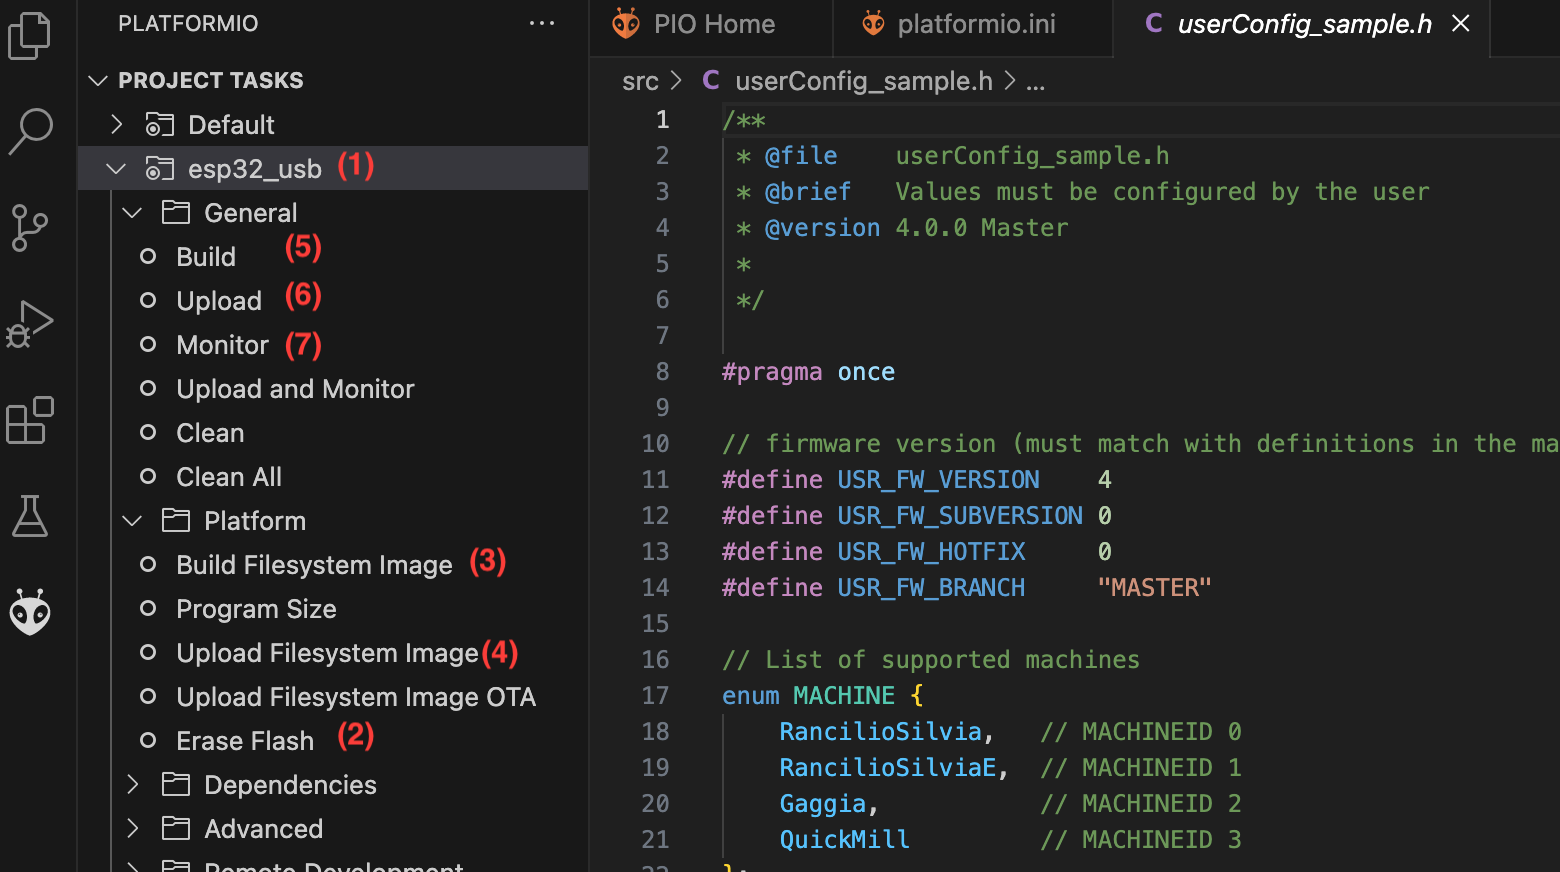
Before you can compile the code, you have to make some small preparations. In VS Code, open the directory tree of the code, open the folder /src and rename the file userConfig_sample.h to userConfig.h:
You can configure basically everything about your espresso machine in that file. The possible settings will be explained later in this manual. Possible configurations are for example the PID mode, OTA settings, hostname, etc. WiFi will be configured later, when the software is running on the microcontroller for the first time.
Compile
You are now prepared to compile the code. The following steps are necessary for that: Click the PlatformIO logo again. Later, you’ll be able to transfer files to the ESP32 directly via OTA, but for now you have to transfer them via USB. The ESP32 must be connected via USB for that.
For each upload- and erase-event it can happen that they don’t complete on first try. IMPORTANT: Press and hold the “Boot” button on the ESP32 (without fat-fingering other Pins). This lets you do an upload via USB (this problem doesn’t exist for OTA later).
For every step, wait for the SUCCESS message to appear:
- (1) Choose your ESP:
esp32_usb - (2) Click
Erase flash(Press the “Boot” button on the ESP32), wait forSUCCESS - (3) Click
Build Filesystem Image, wait forSUCCESS - (4) Click
Upload Filesystem Image, press “Boot” button on the ESP32 (not necessary for the ESP8266) until you see the increasing percentage. Wait forSUCCESS - (5) In
GeneralclickBuild, wait forSUCCESS - (6) Click
Upload, press the “Boot” button on the ESP32 until you see the increasing percentage, wait forSUCCESS - (7) Open the Monitor for the ESP32, you should be able to see the following:
[00:00:02] Connect to WiFi: "silvia"
*wm:[1] AutoConnect
*wm:[2] Setting Hostnames:  silvia
*wm:[2] Setting WiFi hostname
*wm:[2] ESP32 event handler enabled
*wm:[2] Connecting as wifi client...
*wm:[2] setSTAConfig static ip not set, skipping
*wm:[1] Connect Wifi, ATTEMPT # 1 of 3
*wm:[1] No wifi saved, skipping
*wm:[2] Connection result: WL_NO_SSID_AVAIL
*wm:[1] Connect Wifi, ATTEMPT # 2 of 3
Congratulations, the ESP32 (or ESP8266) is now flashed with the software, continue to setup your WiFi!