WiFi Configuration
Table of contents
IMPORTANT NOTE
For versions 3.3.0 and later on the ESP8266, we removed the WiFiManager again, since it lead to a crash during the initial setup. Please put your WiFi connection details (WiFi name and password) into the userConfig.h directly:
#define WIFI_SSID "yourSSID"       // SSID of your WiFi network
#define WIFI_PASS "yourWiFiPass"   // WPA key to your WiFi network
On the ESP32 this problem does not occur, for now please use version 3.2.0 including WiFiManager, and continue with this howto.
TL;DR
For the initial setup, WiFiManager is used. During the first start, the microcontroller will open its own access point, which will be configured according to the settings in your userConfig.h (section “Connectivity”). Settings are: HOSTNAME (default “silvia”) and PASS (default CleverCoffee).
Connect to the access point, choose your local WiFi network and enter the corresponding password. This is saved on the microcontroller and will be used for subsequent starts. The ESP will try to connect to the saved WiFi network for ten seconds. If it fails, it will open the WiFiManager’s portal again for 60 seconds. In case nothing connects to it, the machine will start in offline mode.
Step By Step
After you uploaded the compiled code to the ESP32, you should see the following in the logs (“Monitor” command in PlatformIO):
*wm:[1] AutoConnect
*wm:[1] No Credentials are Saved, skipping connect
*wm:[2] Starting Config Portal
*wm:[2] AccessPoint set password is VALID
*wm:[2] Disabling STA
*wm:[2] Enabling AP
*wm:[1] StartAP with SSID:  silvia
*wm:[1] AP IP address: 192.168.4.1
*wm:[1] Starting Web Portal
*wm:[2] HTTP server started
*wm:[2] Config Portal Running, blocking, waiting for clients...
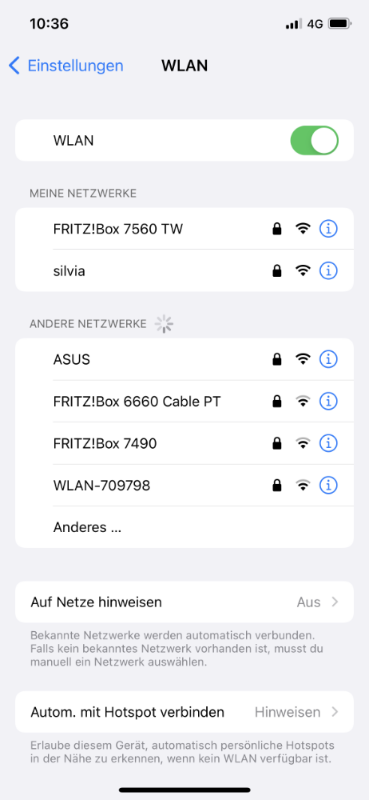
If you search for available WiFi networks with your phone/tablet/computer, you should be able to see the WiFi network silvia.
As soon as you’re connected to this network, a webpage will open automatically, showing the frontpage of the WiFiManager. If that page does not open for some reason, open your browser and type in 192.168.4.1 into the address bar.
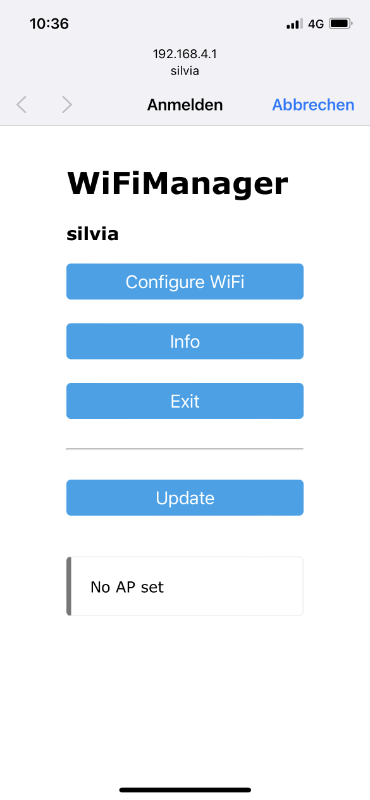
Click Configure WiFi to configure the ESP to connect to your local WiFi network.
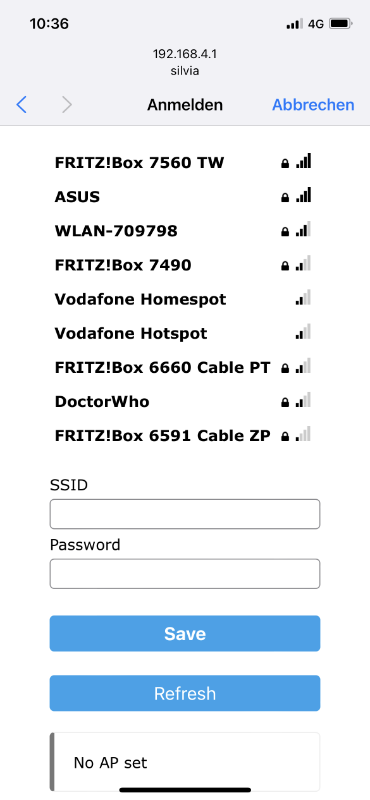
Choose your local WiFi network from the list or enter its name manually. Also enter the WiFi’s password. After clicking Save, the ESP will restart and connect to your WiFi automatically.
Remote Monitoring
Caution: The ESP8266 does not have a remote monitoring capability in version 3.3.0 and later. This part is only applicable to the ESP32 and version 3.2.0
In addition to the website, on which you can configure certain things or watch the current temperature, you can also use PlatformIO / VS Code to access the Serial Monitor via WiFi. This is especially helpful for finding issues during normal operation. We strongly advise you against connecting a microcontroller via USB to your computer while it is in operation inside the machine! Instead, in PlatformIO open esp32_ota -> Monitor.
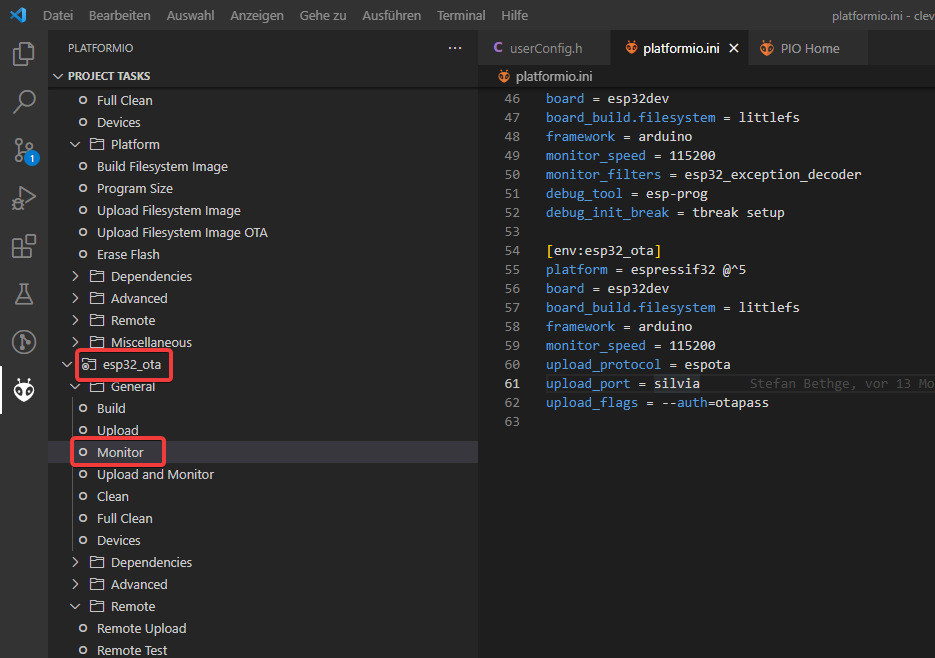
In case you changed the hostname and the OTA password in your userConfig.h, you also have to change the connection details in platformio.ini (section env:esp32_ota).
Important: If you want to use remote monitoring during the initial setup: You cannot use monitoring via USB cable and remotely via OTA at the same time.
Via CLI
If you configured your ESP via CLI before, you can also use the pio command again to start the remote monitoring:
pio run -e esp32_ota -t monitor